Evolving wooden chair for children
Manufacture of an adaptive chair for 40 €
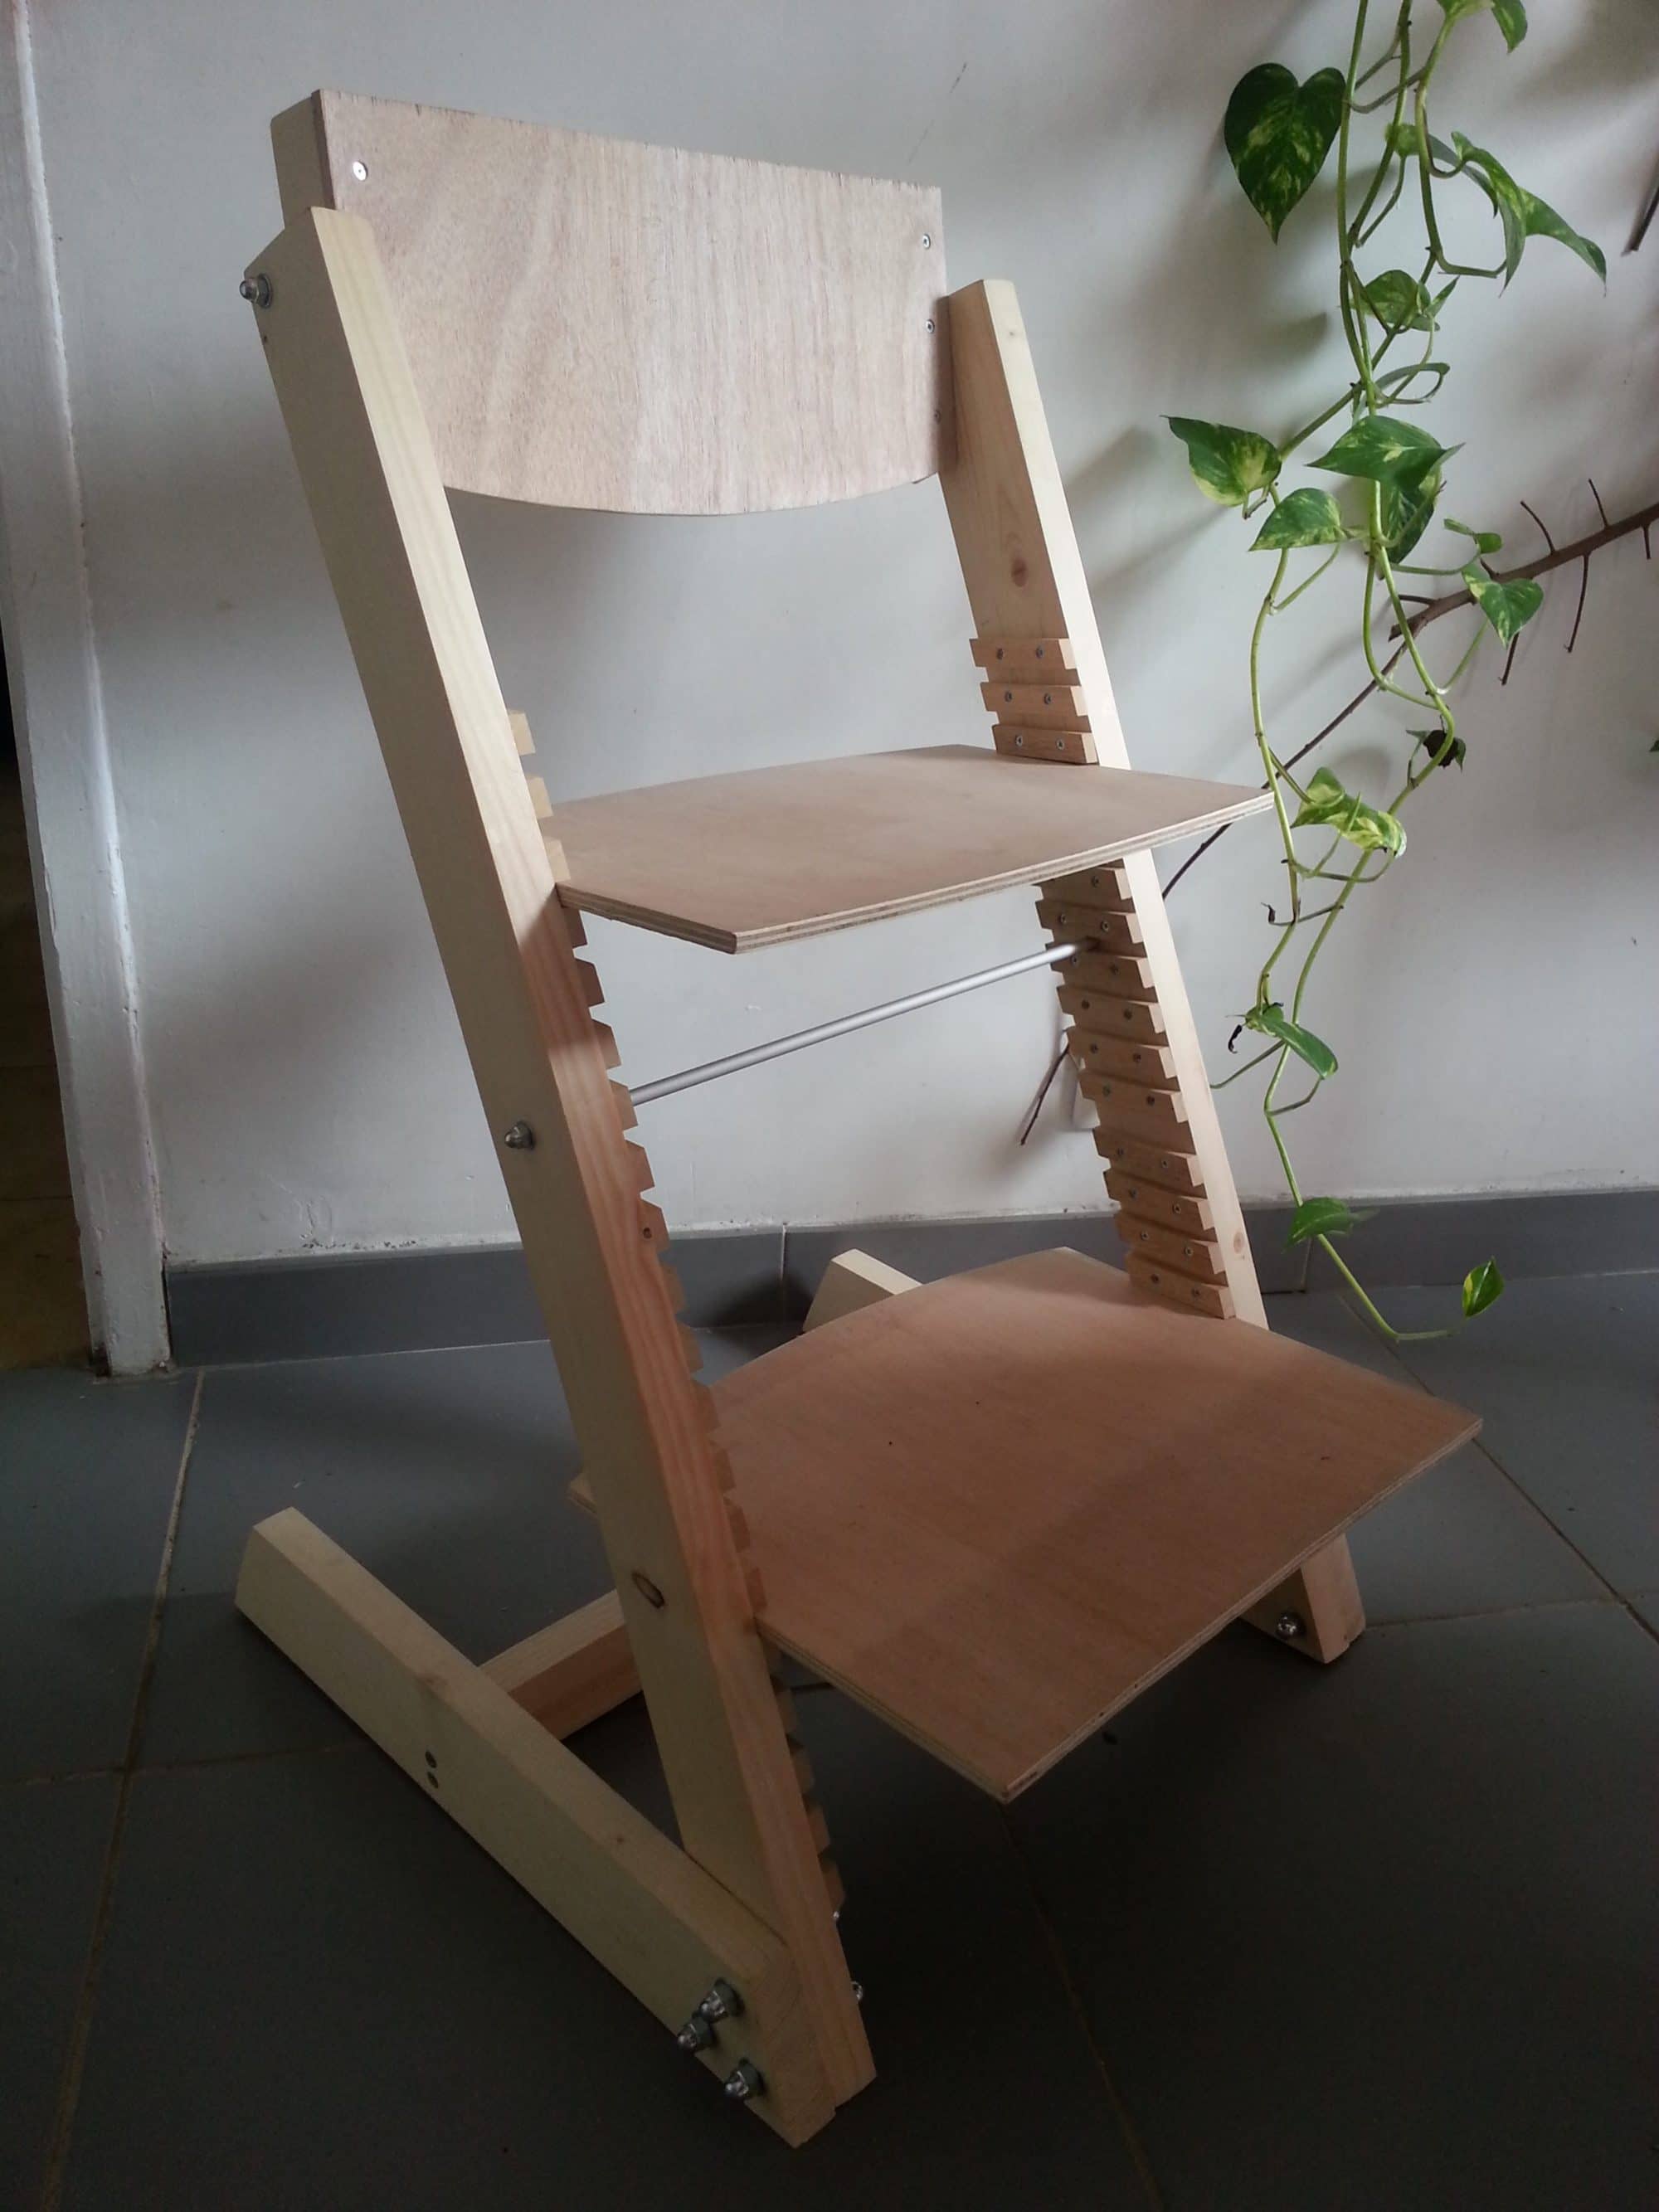
In this project, I wanted to make an adaptive wooden chair inspired by the Tripp Trapp chair. I used for this basic tools such as: circular saw, circular sander, electric screwdriver and jigsaw. My design is a little more "angular" than the original, and my being less comfortable, but it's cheaper!


First, I did a quick 3D one-part modeling (no assembly, it's faster!). With this modeling, I had a preview of the project, I could choose all the components I had to buy.
I bought material for two chairs, the cashier made a mistake, in fact I have about 80 € for this (I have 2 children)


- 2 cleats 20 x 10 mm x 2 m
- 2 round aluminum tubes of 8 mm x 2m
- 2 threaded steel rods 8 mm x 1m
- 1 threaded steel rod 10 mm x 1m
- 1 sheet of 10 mm plywood
- 2 raw fir planks 30 x 150 mm x 2 m
- 10 acorn nut 10 mm
- 200 screws 3 x 25 mm
- 1 furniture oil
Missing from my list above:
- 6 acorn nut 8 mm
- 6 M8 washers
- 4 wood screws 4,5 mm x 80 mm
- 10 M10 washers
- wood glue
- greenhouse
- circular sander disc 40, 80, 120


I make M10 screws with a threaded rod, it's really cheaper! I cut it with a grinder. The nuts must be tightened on the threaded rod before cutting it. By unscrewing the nuts, he straightens the threads. The nuts will be easier to screw after. Rough boards are half the cost, but you have to sand them. I cut in length the 2 raw planks of fir, sand them with a disc of sand of 40 first. The screw cleats are quite long, cut them first, then drill them. Use a free cleat to create a gap between the two cleats (top left in the photo). When all the cleats are screwed in, cut them with a circular saw.
Find all these assembly steps on https://www.instructables.com/id/Adaptive-Wood-Chair/
